Custom Bottle Neckers Sized to the Bottles You Fill
A bottle necker hangs from the neck of a bottle or jar and gives you a second label without touching the main one. The six styles here differ mainly in how they hold on: a cut neck hole, a cone collar, an elastic loop or a tie. Pick the fit first, then the look.
Bottle Neckers, one by one
- 01
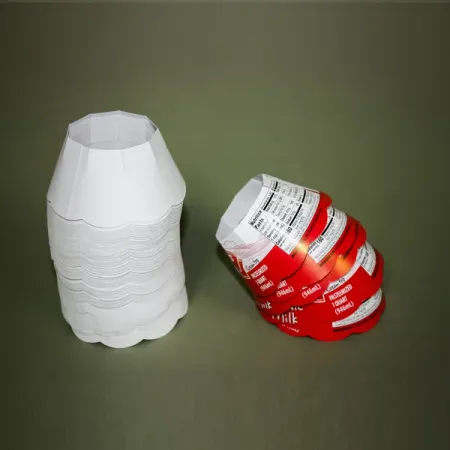 Cone Bottle NeckersA cone bottle necker wraps around the neck and flares out toward the shoulder like a small collar.
- 02
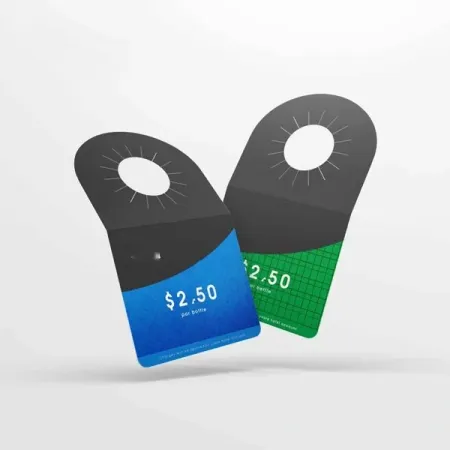 Die Cut Bottle NeckersDie cut bottle neckers are flat printed tags with a hole cut to slip over the bottle neck.
- 03
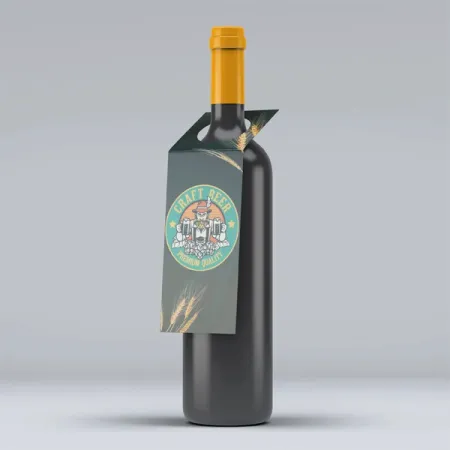 Elastic Loop Bottle NeckersAn elastic loop bottle necker is a printed tag on a stretch loop that hugs the neck or lid of your container.
- 04
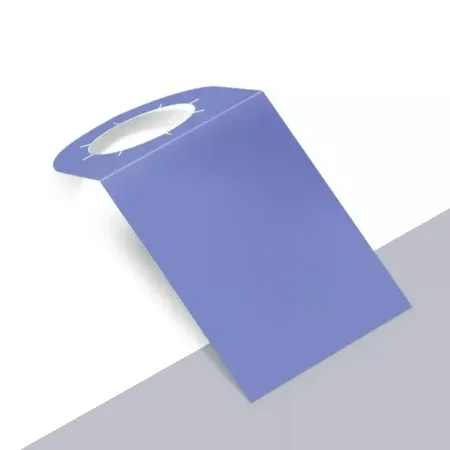 Luxury Bottle NeckersA luxury bottle necker is the first thing a shopper touches on a premium bottle.
- 05
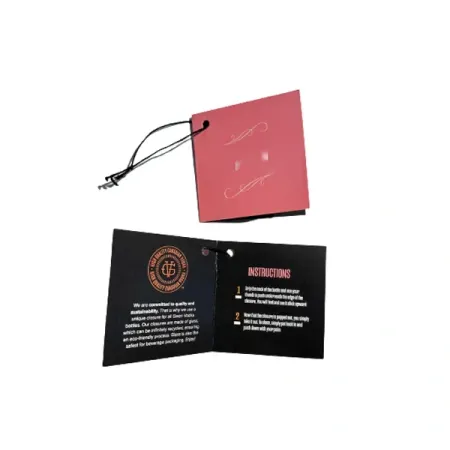 String Tied Bottle NeckersA string tied bottle necker slips over the neck, then a cotton or jute string ties it in place.
- 06
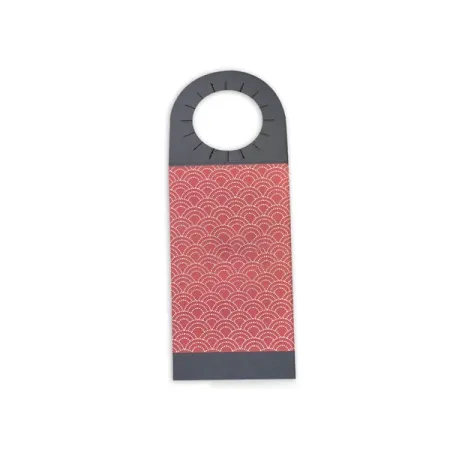 Tied Bottle Neck TagsTied bottle neck tags are small flat tags that hang from a ribbon, string or elastic tied around the neck.
Choosing bottle neckers
What a necker adds that the main label cannot
Your front label is fixed. It carries the product name and the details you must print every time, and changing it means new label stock.
A necker is the flexible layer. It can announce a new flavor, a seasonal recipe, a gift message or a serving idea, then change next month without touching the bottle.
It also sits at eye level on a shelf, where the neck is often the first part of a bottle a shopper sees. Our bottle necker design guide covers layout for that small space.
Neckers also help in online photos. A bright collar or tag makes a bottle easier to pick out in a thumbnail next to similar products.
- Launch messages for a new product or flavor
- Recipes and serving ideas for oils, syrups and sauces
- Gift notes on bottles sold in sets
- Scent or batch details on diffusers and bath oils
- QR codes linking to refill or reorder pages
Six necker styles compared
Every product in this collection is listed below. Find the bottle shape you fill in the middle column, then check how that style attaches.
If two rows both fit, choose by how quickly your team needs to apply them. Slip-on styles go on fastest, while tied styles take longer but look handmade.
Most brands settle on one style per bottle shape. If your range mixes round bottles and jars, two styles in matching artwork usually cover everything.
| Product | Best for | Key detail |
|---|---|---|
| Die Cut Bottle Neckers | Standard bottles with a clear neck | Neck hole cut to size, any outline |
| Cone Bottle Neckers | Bottles with a rounded shoulder | Curved blank that forms a collar |
| Elastic Loop Bottle Neckers | Jars, odd shapes and wide necks | Stretch loop instead of a neck hole |
| Luxury Bottle Neckers | Gift bottles and premium lines | Foil, embossing and painted edges |
| String Tied Bottle Neckers | Small-batch and handmade bottles | Neck hole plus a hand-tied string |
| Tied Bottle Neck Tags | Jars, gift bottles and favors | Small tag tied on with ribbon or string |
Fit comes first: how each necker holds on
A necker that slides down the bottle or flies off in a delivery box is worse than none. Fit is the first decision, and it depends on the bottle, not the brand.
Die cut neckers use a hole cut to the neck size, either a full circle or a circle with a slit so it opens. For most round bottles with a lip or cap, die cut bottle neckers with a sized hole are the simplest fit.
Elastic and tied styles hold by tension instead of a sized hole. That makes them more forgiving when you fill several bottle sizes.
Fit also affects how bottles pack. A necker that sticks out sideways can bend in a shipping box, so flat-hanging styles travel better than wide collars.
Measuring your bottle the right way
Measure the real bottle, not the supplier's drawing. Caps, wax seals and pumps can all add width the drawing does not show.
Use calipers or a strip of paper wrapped around the neck. Note the narrowest point where the necker will rest and the widest point it must pass over.
If you fill more than one bottle size, measure each one. Sending us a sample bottle is even better when the shape is unusual.
Add a little clearance to the cap measurement, around 1/16 in, so the necker slides on without tearing. We confirm the final hole size on your proof.
- Measure the widest part the necker must slide over, usually the cap.
- Measure the neck where the necker will sit.
- Note the height from the shoulder to the cap.
- Photograph the bottle beside a ruler.
- Send all three numbers and the photo with your quote request.
Bottles with a shoulder: when a cone collar fits better
Some bottles have a sloping shoulder that makes a flat necker tilt forward. A collar that follows the curve sits flush instead.
A cone necker is printed flat on a curved blank. When the ends are joined, it forms a short ring that rests on the shoulder like a collar.
This suits oils, syrups and cold-pressed drinks in rounded bottles. Our page on cone bottle neckers for rounded shoulders explains the joining options.
Jars and odd shapes: neckers that stretch
Jars, square bottles and wide-neck containers rarely suit a cut hole. The hole either gaps or will not pass over the lid.
An elastic loop solves that. It stretches over the lid and grips the neck or the rim, whatever the shape.
One loop length can often cover two or three container sizes. That is why elastic loop bottle neckers for odd shapes suit brands with a mixed range of jars and bottles.
Test the loop on your smallest container first. A loop that sits loose there can slip off inside a delivery box.
Tied neckers and neck tags for a handmade look
String and ribbon bring a softer, crafted feel. They suit honey, preserves, bath oils and gift bottles sold at markets or in boutiques.
A tied necker still has a neck hole, with string added for looks and a little extra hold. A tied neck tag is smaller and hangs from the string alone.
If you want a full necker with a knot detail, look at string tied bottle neckers with cotton or jute. For a small gift label on a jar, a tied tag is usually enough.
Pre-tied string saves the most time here. Ask for strings attached before shipping if your team fills more than a few dozen bottles at a time.
What to print on a necker, front and back
A necker gives you two small panels. Treat the front as the hook and the back as the detail.
The front should carry one message a shopper can read from a step away. A flavor name, a launch line or a gift note works better than a paragraph.
The back can hold the rest: a short recipe, usage directions, a refill reminder or a QR code. Keep anything you might change often on the necker, not on the main label.
Leave a clear zone around the neck hole. About 0.125 in of plain space stops text from being cut or hidden when the necker sits on the bottle.
- Front: logo plus one short headline
- Back: recipe, directions or story
- Back: QR code at least 0.75 in wide
- Around the hole: no text or fine detail
Stock and finish for bottles that get handled
Bottles get gripped, chilled and sometimes splashed. Coated stock and lamination keep the print clean.
For bottles stored in a fridge, matte or gloss lamination helps the necker survive condensation. Uncoated and kraft stocks look natural but mark more easily when damp.
Thicker stock holds its shape on the neck. Most neckers use 16 pt to 18 pt, and premium designs go up to double-layered 24 pt or 32 pt.
Oily products need extra care. Olive oil, bath oil and hot sauce can stain uncoated card, so laminate any necker that might get a drip.
| Stock | Where it works | Watch out for |
|---|---|---|
| 16 pt coated, laminated | Everyday bottles, chilled products | Plain look without a finish |
| 18 pt coated, laminated | Larger neckers that must stay flat | Slit holes need a clean cut |
| Kraft board | Handmade and natural products | Marks if stored damp |
| 24 pt or 32 pt double-layered | Gift and premium bottles | Stiffer to bend around a cone |
Necker mistakes that show up on the shelf
Most necker problems come from fit and copy placement, not from print. A few checks at proof stage save a reprint.
If you also want a tag on a jar lid or gift ribbon, compare these with tied bottle neck tags for jars. They avoid most of the fit problems below.
- Sizing the hole to the neck but forgetting the cap must pass through
- Putting key copy where the necker folds or bends
- Using a slit hole on bottles that ship loose, so neckers fall off
- Choosing uncoated stock for products kept in the fridge
- Repeating the front label instead of adding new information
- Making text smaller than about 6 pt on a necker read at arm's length
Ordering, proofs and delivery for neckers
Send your bottle measurements, logo and copy, and we return a quote with a free digital proof. Revisions are unlimited, and we check hole size on every proof.
Once you approve, neckers are printed in 4 to 6 business days and reach you 2 to 3 business days later. Delivery is free to the US, UK, Canada and Australia, with prices from $0.30 per unit.
Plan around your bottling day. If neckers must be on bottles for a market or launch, approve the proof at least two weeks before.
Need help laying out the design first? You can design your bottle neckers with our team before you request a quote.
Bottle Neckers: questions buyers ask
It is a printed card that hangs around the neck of a bottle or jar. It adds a message without changing the main label.
Measure the widest part the necker must pass over, usually the cap, and the neck where it sits. We size the hole from those numbers and show it on the proof.
A slit hole opens to pass over a wider cap, then closes around the neck. A full circle hole is simpler but must fit over the cap as cut.
Elastic loop neckers and tied neck tags work best on jars. A cut hole rarely fits over a wide lid.
Often, yes. Elastic loops are the most flexible, and a slit hole can cover two close neck sizes.
Choose coated stock with matte or gloss lamination. It resists condensation far better than uncoated or kraft stock.
Yes. The back is a good place for recipes, directions or a QR code.
They usually ship flat to save space and are joined on the bottle. Ask on your quote if you need a different setup.
Yes. Loops and strings can be attached before shipping, so neckers are ready to put on.
Foil stamping, embossing, soft-touch lamination and painted edges on thick stock. One main finish usually looks better than several.
Yes. Send your label file or color references and we match them on the proof.
Production takes 4 to 6 business days after proof approval. Transit adds 2 to 3 business days.
Design Your Tags
Choose a tag from the photos, put your logo on it and send it to us. A designer turns it into a print-ready proof within one business day.
Step 1 · Choose a tag
Step 2 · Place your logo
Upload a logo, then drag it into place on the photo.
Tell us about your tags
Give us the size, stock and quantity, attach your artwork, and we reply with a price and a free digital proof within one business day.
- Proof
- Free, with unlimited changes
- Production
- 4–6 business days after approval
- Shipping
- Free to the US, UK, Canada and Australia
- Pricing
- From $0.30 per unit
Rather talk? Call (503) 461-4788, message us on WhatsApp or write to info@thehangtags.com.